

veeradesigner
For designer
| Using XAMPP for Local WordPress Theme Development | 8:00 PM |
|
Filed under:
|
|
April 26th, 2009 by Jacob Gube | 13 Comments | Stumble It! Delicious
In this tutorial, you’ll learn how to install and configure XAMPP for the desktop. Once that’s out of the way, we’ll install WordPress so that you can have your very own professional, light-weight PHP and WordPress development environment.
Introduction
To sum it up in one sentence: XAMPP, which stands for Cross-Platform (X) Apache, MySQL, PHP and Perl, is a popular, free and open source web server package that you can use to install a web server onto your desktop.
XAMPP allows you to develop PHP and Perl-based server-side scripting applications without the need for a remote web server, offering you the opportunity to work faster, develop stuff more securely, and work on your apps without an internet connection.
In this tutorial - you’ll see exactly how XAMPP can do splendid things to your development cycles.
We’re going to use a simple xampple (sorry, I had to get that out of the way, been thinking about saying that for a long time): we’re going to install XAMPP and WordPress with some test data to have WordPress right on our desktop.
This tutorial is for Windows Vista, so you’ll have to tweak the steps involved depending on your operating system. Here’s what you’ll be doing in this tutorial:
Objectives
- Downloading and Installing XAMPP
- Starting up your Apache and MySQL services
- Installing and configuring WordPress locally
- Creating a MySQL database for WordPress
- Creating a MySQL database user for WordPress in phpMyAdmin
- Importing some test data for WordPress using an XML file
This tutorial covers installing XAMPP in Windows Vista, so you’ll have to tweak the steps a little bit if you’re using a different operating system.
Obtaining XAMPP and choosing a version
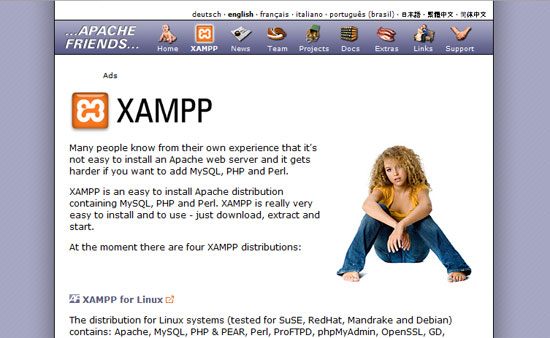
1 Obtain a copy of XAMPP for Linux, Windows, or Mac OS X at the apache friends XAMPP web page.
http://www.apachefriends.org/en/xampp.html
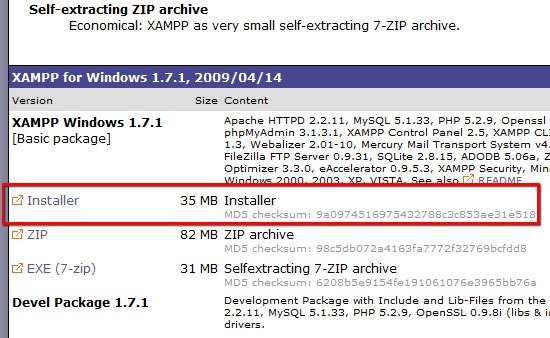
2 Choose the package you want: for normal web development, just go with the Basic Package.
The Basic Package comes with a host of useful applications, libraries, and extensions such as phpMyAdmin (which we’ll use to set up WordPress later on) and eAccelerator (a popular PHP caching application to optimize and improve PHP script performance). For this tutorial, choose the Installer version.
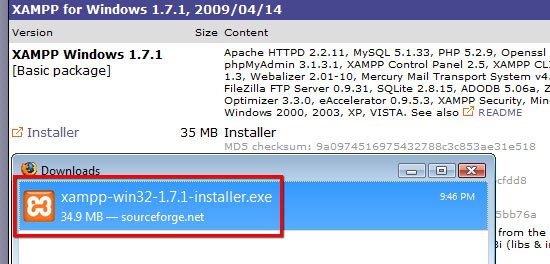
Download it (Save File) onto your computer.
3 Open up the executable (for Windows users, it’s called xampp-win32-1.7.1-installer.
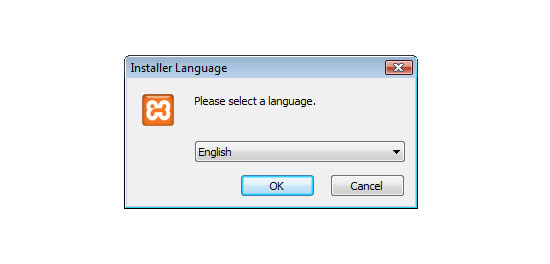
The following figure shows the first dialog box; it asks you to select which language you want to use.
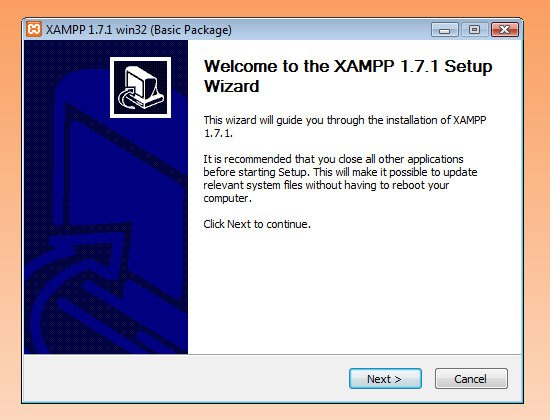
The next dialog you’ll see is the first page of the XAMPP Setup Wizard.
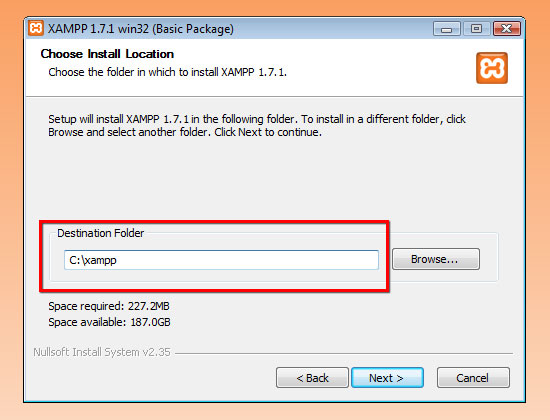
4 Pick a destination for the installation.
Note: XAMPP suggests not to install it in the Program Files folder (i.e. C:\Program Files\xampp), so just install it in the root of your drive (C:\xampp)
5 Configure your options in the XAMPP Options dialog box. For this tutorial, just go with the default installation options.
That’s it for the installation, quick and painless wasn’t it? Let’s fire up Apache and MySQL.
Starting up your Apache and MySQL services
6 After the installation, you should’ve been presented with an option that asks you to open the XAMPP Control Panel. If you didn’t get that option, do one of the following:
Option 1: Navigate to it using the Windows interface
Start > All Programs > Apache Friends > XAMPP > XAMPP Control Panel
Option 2: Open the XAMPP Control Panel directly
If you didn’t select the "Create Shortcut" option in the installation, then navigate to the XAMPP installation folder and open the file called xampp-control.exe.
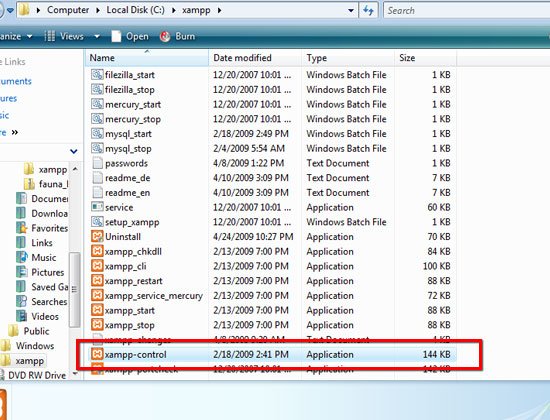
7 The XAMPP Control Panel should look like the following figure:

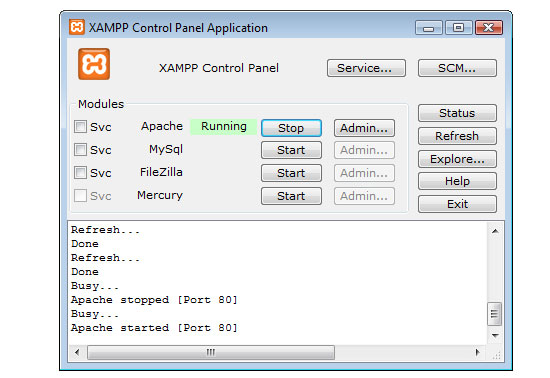
8 Click the Start button beside Apache. If you’re on Windows, you’ll get a Windows Firewall warning: choose Unblock.

9 If all goes well, you should see the XAMPP Control Panel log updated with "Apache Started", and "Running" with a green background right beside the Apache service.
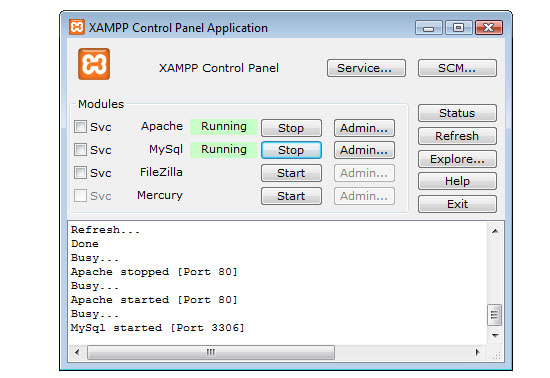
10 Start the MySQL service using the same method as step 8.
Testing to see if it works
11 With your Apache and MySQL services started, open up a web browser and navigate to localhost using the following path:
http://localhost
12 You should see the following screen:
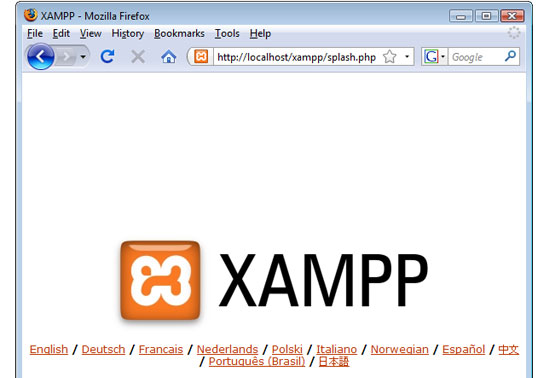
Congratulations, you now have your very own locally hosted (localhost) web server!
Depending on your operating system, you’re now the proud owner of a WAMP (Windows users), MAMP (Mac OS X users) or LAMP (badass Linux users) server right there inside your computer.
Now let’s move onto installing WordPress on your machine. First, we’re going to set up your WordPress MySQL database and create a MySQL database user for it. That’s the topic for the next section.
Setting up your MySQL database for WordPress
The easiest way to create a MySQL database using XAMPP would be to use phpMyAdmin, which comes with the Basic Package that we installed.
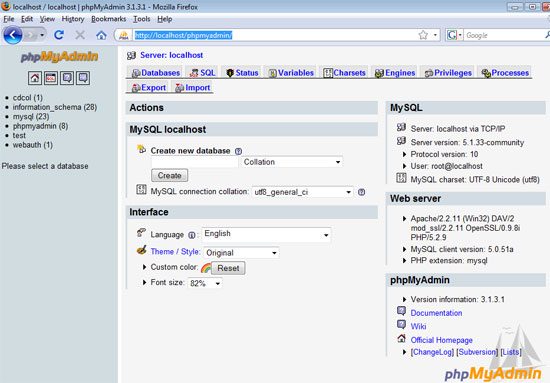
13 Navigate to phpMyAdmin through your web browser. The URL is:
http://localhost/phpmyadmin/
14 Create your WordPress database by entering in a name and pressing the Create button.
In this tutorial, we’ll call it wordpress_db. You’ll need to remember this value for a later step when we configure WordPress.
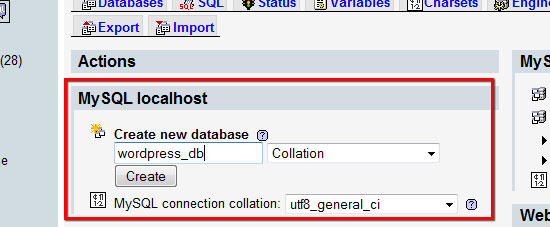
This is what the following screen will look like:

Creating a WordPress database user
In real-world scenarios, you should never use the default root user because it has all privileges and you don’t want a simple WordPress bug or vulnerability taking down your entire MySQL service.
This isn’t necessary if you’re only testing locally, but we’re going to do this right to promote best practices.
15 Go to phpMyAdmin home by either clicking on the logo on the top left or clicking on the home icon.
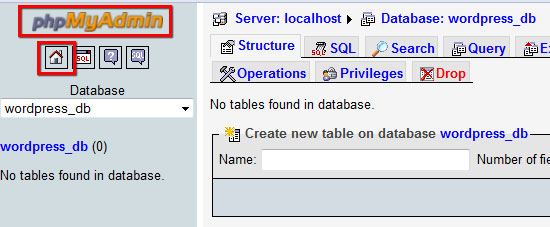
16 Click on the Privileges tab.
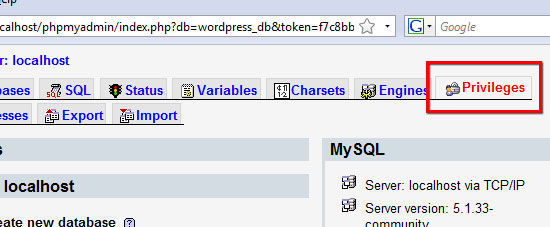
17 Click on "Add a New User"

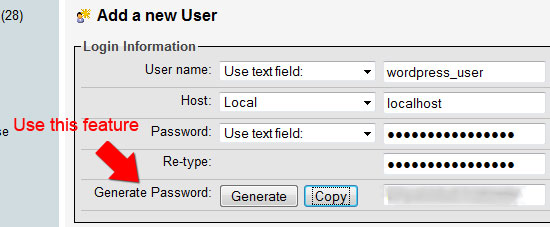
18 For the User name field, type in any name, this tutorial uses wordpress_user for simplicity. For Host, select Local.
For Password, type in a value, but it’s highly recommended that you use the Generate Password button to randomly generate a password for better security.
Once you hit the Generate Password button, click on Copy button right beside it to copy it automatically in the Password and Re-type fields.
Important: take a note of the User name and Password you used, we’ll be using it later on.
Here are the settings used:
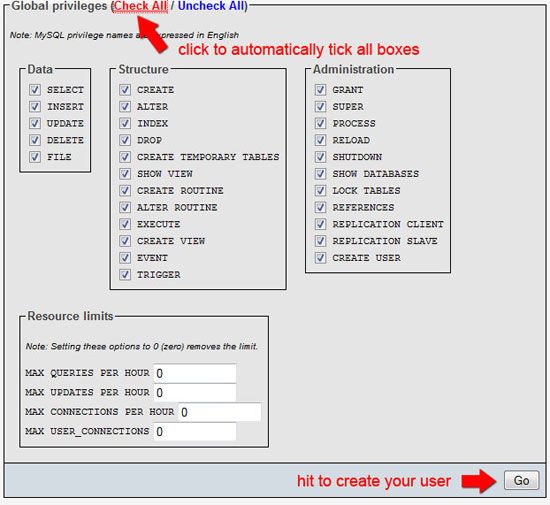
19 Set the Global Privileges of wordpress_user. Typically, you should try to limit the privileges of your database users to a minimum to improve security.
For this example, since it’s a local installation - just check all of them. When you go into production, pare down the privileges!
Hit the Go button to create the database user.
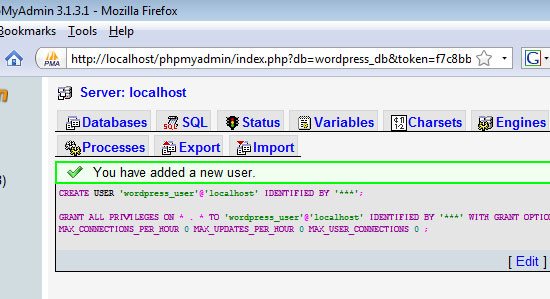
20 If everything went well, you’ll see a confirmation that you’ve created the user successfully.
Adding your newly created user to your database
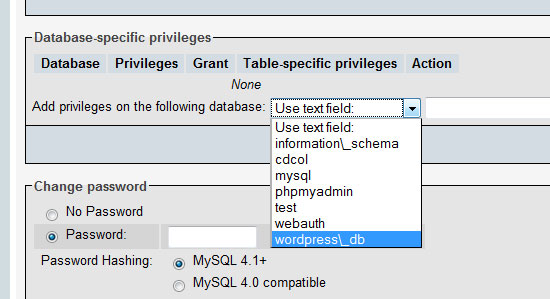
21 In the next screen, in the Database-specific privileges fieldset, in the Add privileges on the following database field, select wordpress\_db.
This will add wordpress_user as a database user of your wordpress table, wordpress_db.
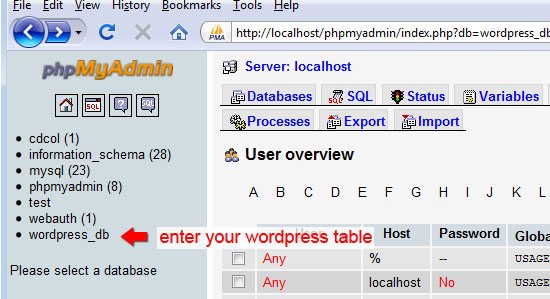
22 Check that wordpress_user has been added to the database by entering your database.
To enter your database, click on wordpress_db in the left-hand navigation.
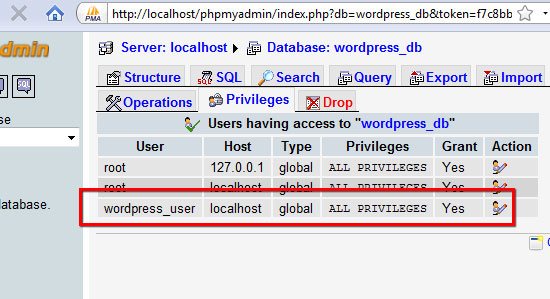
23 Click the Privilege tab to see all users that have access to your WordPress database. You should see wordpress_user listed in the Privilege section.
Alright, you’ve just learned how to create a MySQL database user using phpMyAdmin. Give yourself a pat in the back before moving on!
Installing WordPress on your computer
If you’re not familiar with the process of installing WordPress, you should take a look at the following guide on the official WordPress.org site first:
This guide will get you up and running with the general process that we’ll be taking. Please take a moment and read it - I promise, it’ll be quick and painless.
24 Download the latest version of WordPress, save it on your computer.
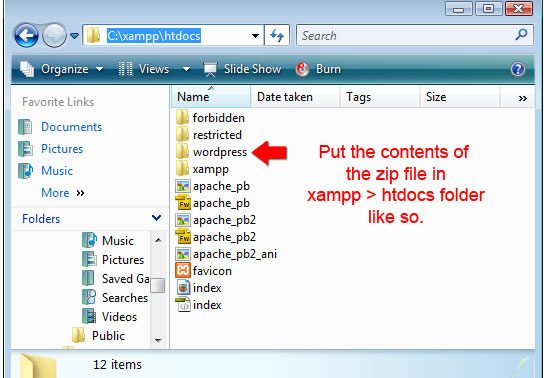
25 Open your xampp folder. Navigate to the htdocs folder.
If you used the default installation destination, the file path is:
C:\xampp\htdocs
26 Open up the WordPress ZIP file you downloaded. Extract the entire contents in the htdocs folder.
Configuring WordPress: entering your MySQL database information
27 Inside the wordpress folder, open wp-config-sample.php file using your favorite text editor.
Fill in the information with your database information. If you followed along and used the same values as this tutorial, you can use these values:
/** The name of the database for WordPress */
define('DB_NAME', 'wordpress_db');
/** MySQL database username */
define('DB_USER', 'wordpress_user');
/** MySQL database password */
define('DB_PASSWORD', 'typeyourpasswordhere');
/** MySQL hostname */
define('DB_HOST', 'localhost');
28 Once you’re done with the configuration file, save it as wp-config.php in the same folder.
Note: You have to save it as wp-config.php and not wp-config-sample.php.
Running the WordPress install script
29 To finish the installation of WordPress, navigate to the install script. Here’s the file path:
http://localhost/wordpress/wp-admin/install.php
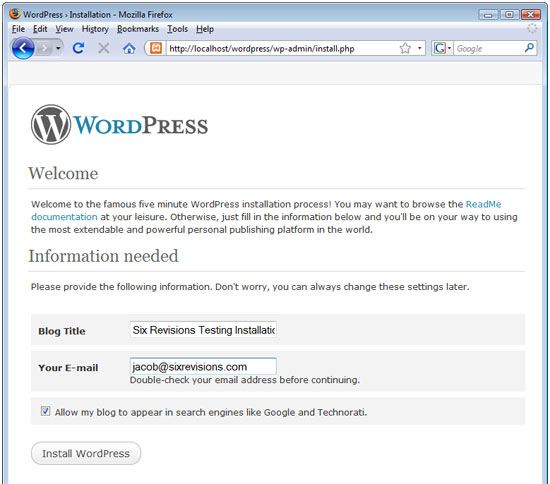
30 If you did everything correctly, you should be greeted by the following screen:
31 Just hit the Install WordPress button, and follow the steps. If this is your first WordPress installation, read the steps of the installation dialog carefully as we won’t be covering it here in detail.
Testing to see if your WordPress installation works
32 Navigate to the home page of your WordPress installation. The file path is:
http://localhost/wordpress/
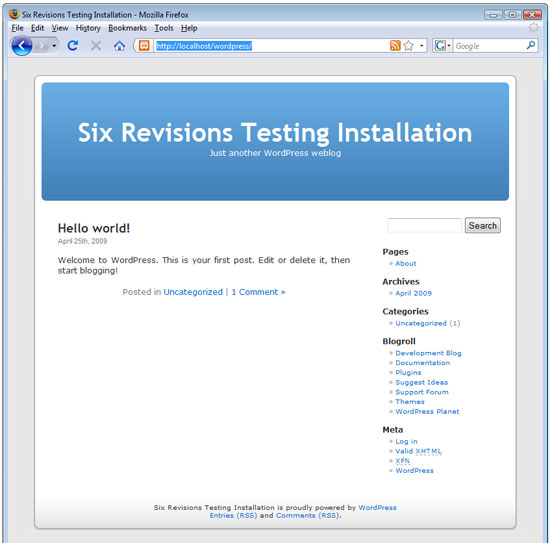
If everything went well, you should see the default WordPress home page:
Important: take a note of the auto-generated password or else you won’t be able to log into WordPress.
WordPress local installation completed!
Woot, you just installed WordPress on your computer! No more FTP’ing or live web development! You can now test your themes or test site updates before going live.
At this stage, you can log into the WordPress administration section:
http://localhost/wordpress/wp-admin
Alternatively, you can continue in the tutorial (because we’re not done yet).
Next, we’re going to import some test data which you should do when you’re developing WordPress themes to be released to the public.
Importing WordPress test data
33 Download the WordPress XML file from the official WordPress.org site. You can get it through the Theme Development Checklist (which is a great guide by the way), under the Theme Unit Test section.
Here’s the direct download link:
http://svn.automattic.com/wpcom-themes/test-data.2008- 12-22.xml

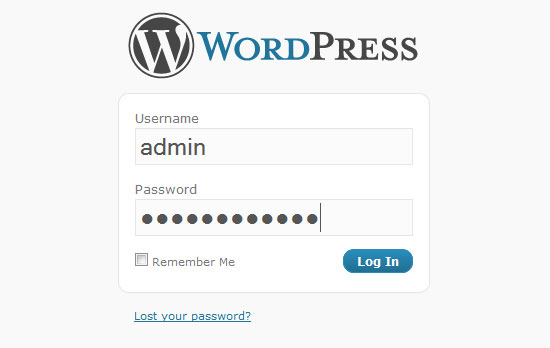
34 Log into the WordPress administration section:
http://localhost/wordpress/wp-admin
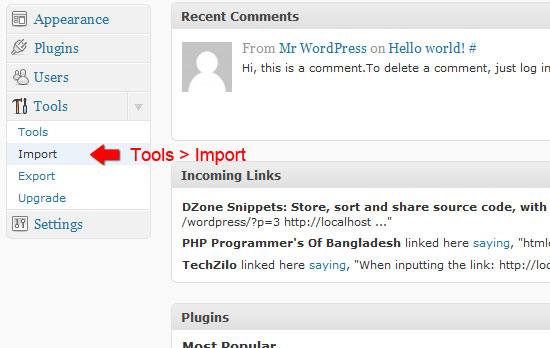
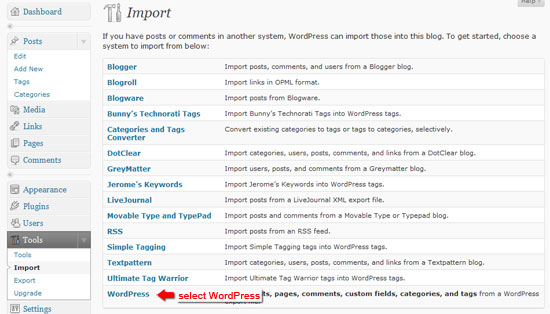
35 In the WordPress admin section, go to Tools > Import (using the sidebar navigation on version 2.7).
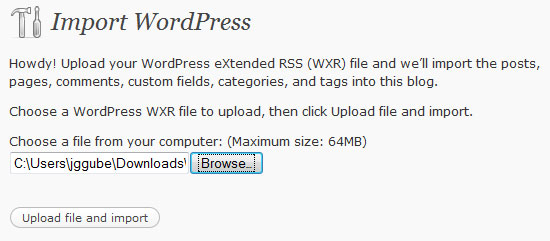
36 In the Import page, click on WordPress.
37 Browse to the XML file we downloaded (test-data.xxxx-xx-xx.xml).
Hit the Upload file and Import button.
38 Assign the authors of the post. The XML file created a testing author named Noel Jackson for you.
If you don’t want to assign the test posts to Noel Jackson, use the or map to existing field and select the author you want. For this tutorial, assign it to admin.
Click the Submit button.
39 You’ll be presented with a log of all the changes made by the import process. Examine it if you want to see exactly what happened.
40 Check to see if the import went according to plan. Easiest way is to go to the home page of your WordPress installation (http://localhost/wordpress).
41 In the home page, you’ll see that there’s now content for your WordPress installation. This way you can easily check and test your theme for public release.
You’re done, you professional PHP/WordPress developer!
Now you can develop WordPress themes and test changes locally on your computer, just like the pro’s, not only speeding up your development cycles, but also being able to securely test updates to your existing themes.
Where to go from here
Here are things you should try and do to explore XAMPP:
Try to install a free WordPress theme
Go to the WordPress Themes section for themes you’d like to try out. Alternatively, check out our lists of free WordPress themes: Excellent Free WordPress Themes and Beautiful Free WordPress Themes.
Create a new site
Create a folder under the xampp > htdocs and put some test PHP scripts in it. As you can see, you don’t need a web server anymore, you have a fully-featured MySQL and PHP server right there in your computer. Go develop some cool web applications!
Explore additional XAMPP add-ons
There are a good number of XAMPP add-ons for you to extend your local web server. Check them out and install the ones you need. Go to either the Windows, Linux, or Mac OS X download pages to see a list of add-ons you can install.
Summary
In this tutorial, you just learned how easy it is to install XAMPP to the desktop so that you can have your very own PHP web development testing server. More specifically, this is what we did together:
- Installed XAMPP
- Started the Apache and MySQL Services
- Created a MySQL database
- Created a MySQL database user
- Installed and configured WordPress
- Imported some test data
Further resources
- Install Wordpress On Your Mac Using MAMP on Free Mac Blog.
- Installing XAMPP on Linux called Install XAMPP for easy, integrated development.
- Learn more about XAMPP in the apache friends xampp home page.
- Discover phpMyAdmin and how to use it in the phpMyAdmin official site.
Report a bug or provide some feedback, why don’t you?
Feel free to provide feedback and ask questions (lots of them!) in the comments. Mistakes happen - so please let us know if we made a mistake or you see an error.

0 comments:
Post a Comment